

Dakboard runs on the Raspbian operating system and has features such as the ability to customise screen layouts and support for several time zones. Because it synchronises all of the Google and Facebook calendars and also notifies us about important days that are marked on the calendar, we could use the Dakboard in conjunction with the Raspberry Pi to display the digital calendar on any screen. This would be possible because the Dakboard also displays notifications. It’s possible that we’ll sync the images using the Dakboard OS as well.
In this post, we looked at how to download and set up the Dakboard application on the Raspberry Pi so that a digital calendar could be displayed on a screen that was connected to the Raspberry Pi.
How to Download the Dakboard Image on a Raspberry Pi
In order to retrieve the photo, we are going to go to the Dakboard website.
Flashing the Dakboard image on a Raspberry Pi: the Step-by-Step Guide
You may acquire the most recent version of the Dakboard , v2.29, for the Raspberry Pi 4 by visiting the Dakboard website. When the image has finished downloading, we will start the Raspberry Pi imager, which can be purchased from the official website of the Raspberry Pi, to flash the image file of the Dakboard onto the micro SD card. This may be done by following the instructions found on the Raspberry Pi website. Choose “CHOOSE OS” from the drop-down menu that appears once the imager Raspberry Pi has been launched, and you will see a number of different operating system choices:
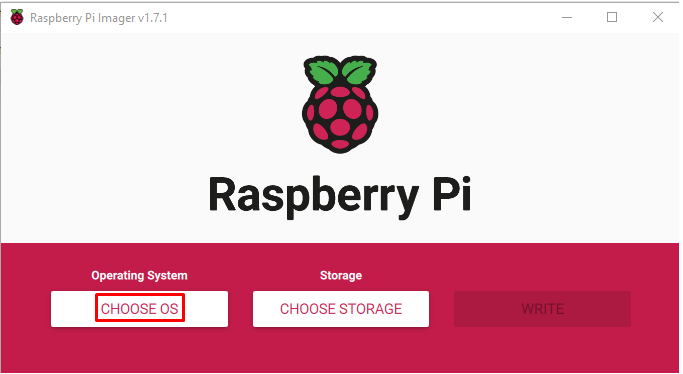
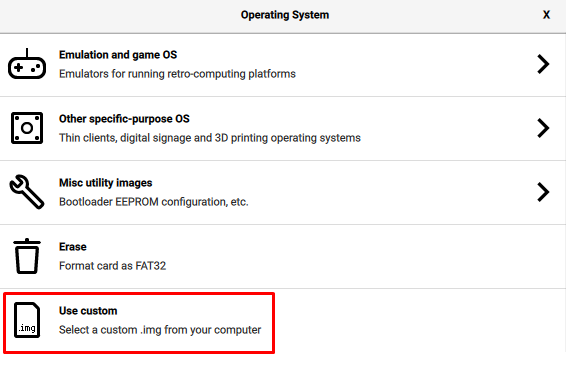
Scroll through the options in the drop-down menu that are now displayed, and then select the “Use custom” option that is located at the bottom of the screen to select the image file that was downloaded to the Dak board:
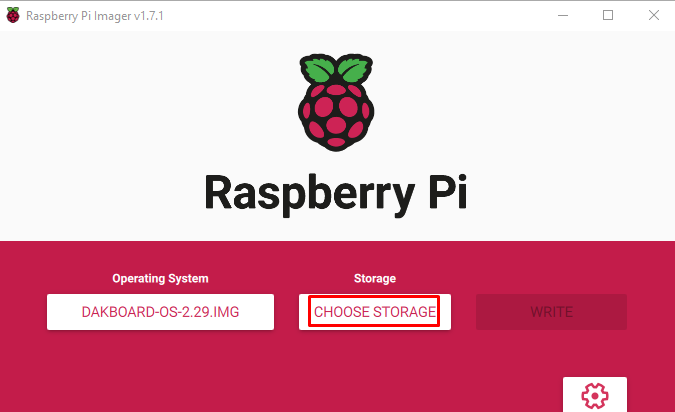
Following the selection of the Dakboard image file, the storage medium, which in this case is the microSD card, must be chosen before the Dakboard file can be written:
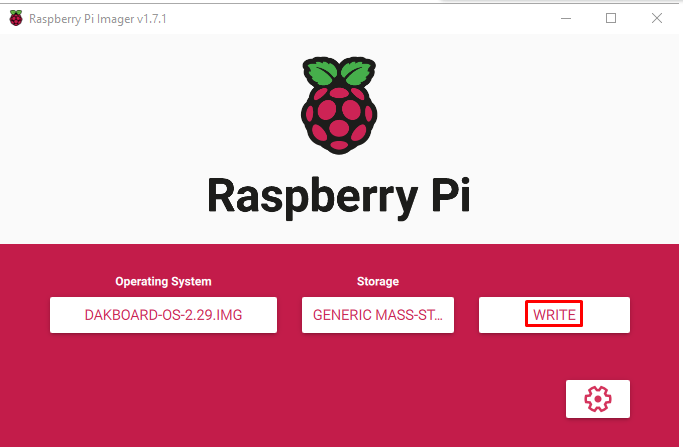
Finally, you will need to hit the “WRITE” button in order to begin writing the Dakboard image file onto the micro SD card:
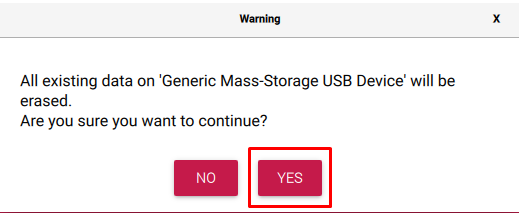
If you proceed with the process, a notification will appear alerting you that all of the data stored on the SD card will be deleted; To continue, press the “YES” button.
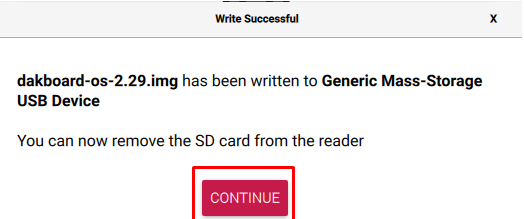
The process of flashing the image onto the Raspberry Pi will take some time, but after it is finished, a notification will appear, notifying you that you may now remove the storage device. Click the “CONTINUE” button to proceed with the process.
The Step-by-Step Guide to Creating a Dakboard Account
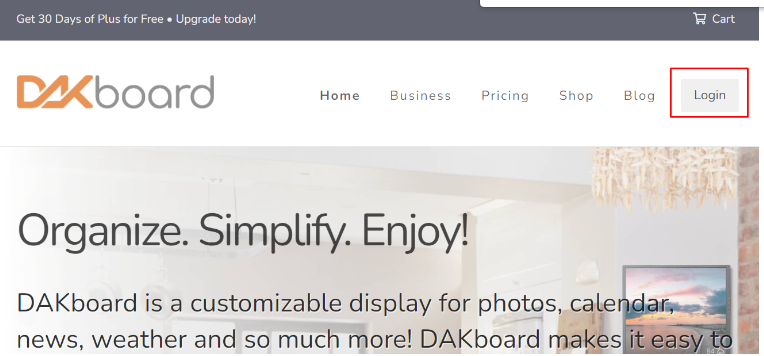
In order to create a new user account, we will go to the Dakboard website and select “Login” from the list of choices located above it in the menu:
After that, we will go to the bottom of the new dialogue box and pick the option that says “Create an account.”

By entering your “Username,” “Email,” and “Password,” you have the option of using your existing Google account or creating a new one.
How to get the Raspberry Pi 4 Dak board to boot up and configure its settings
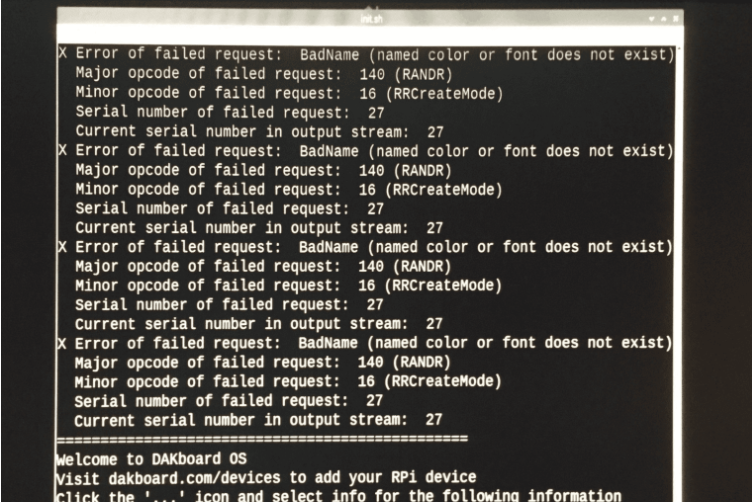
After doing so, we will turn on the Raspberry Pi 4 and then put the microSD card that contains the Dakboard image file into the appropriate slot on the Raspberry Pi 4. The operating system of the Dakboard will boot up after a brief period of time, at which point the following screen will appear:
It will take three to four minutes to load, and on the very first boot, an “init.sh” file will emerge, at which point you will be prompted to enter the serial number:
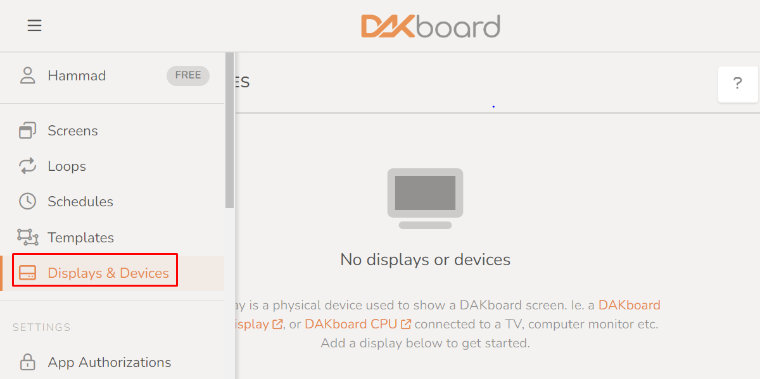
In order to obtain this serial number, we will use a web browser to log into the newly created Dakboard account and select the “Displays & Devices” option from the account’s side menu:
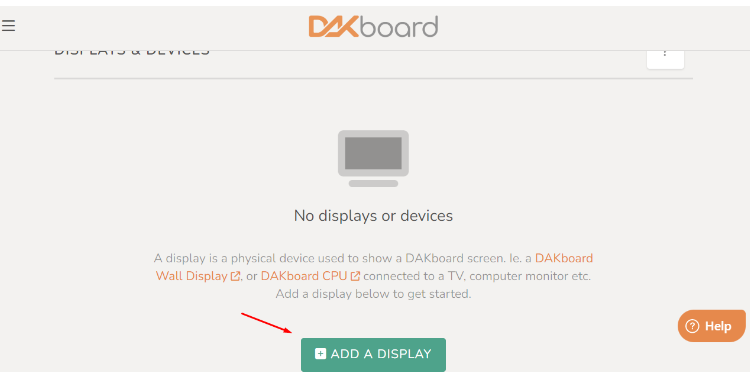
After that, select the “ADD A DISPLAY” option in order to include the Raspberry device in the existing account.
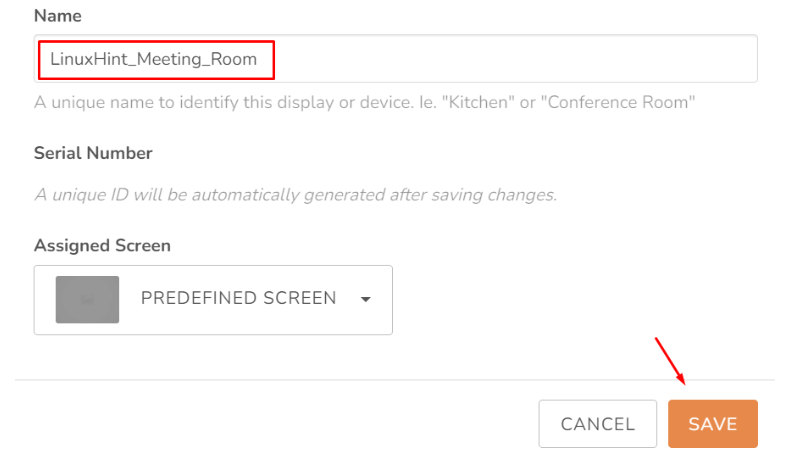
Entering a name that is completely unique to the meeting room, such as “LinuxHint Meeting Room,” is required before clicking the “SAVE” button:
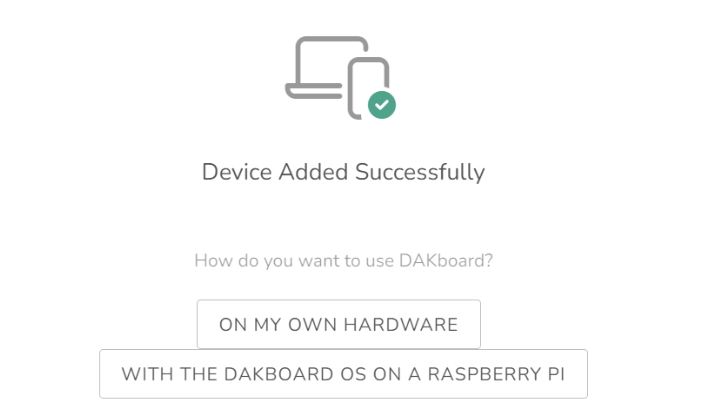
Click the “Close” button when you see the message “Device Added Successfully” shown on the screen.
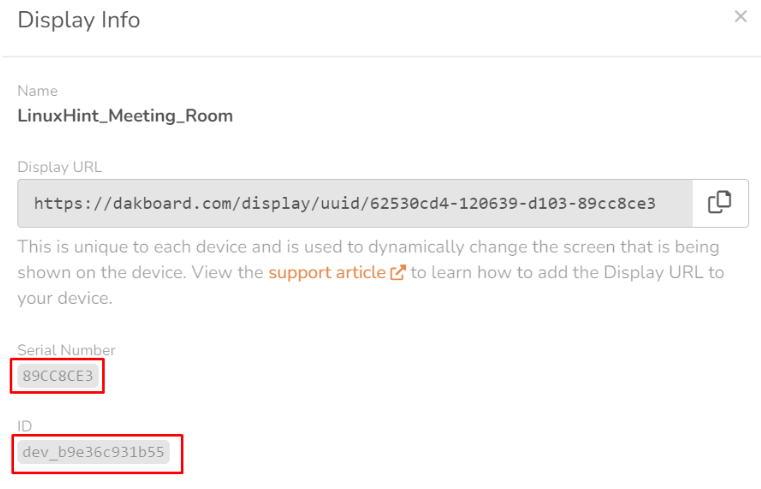
After that, pick “Info” from the menu that appears after clicking the sign shown by three dots:
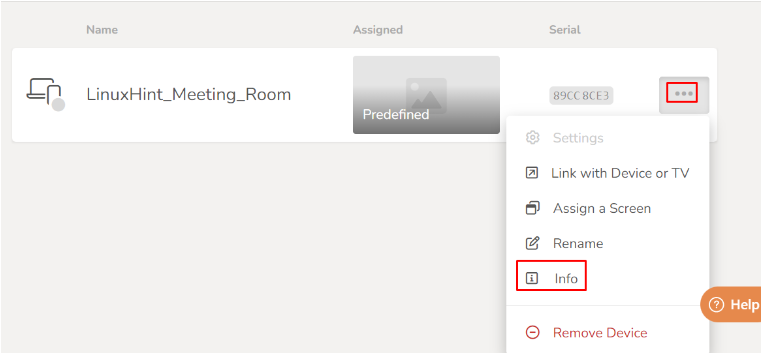
The identification number and serial number have been provided. Make a mental note of these and enter them into the OS option on the Dakboard:
After you have entered them, the screen will update to read “if you are connected to WiFi:”
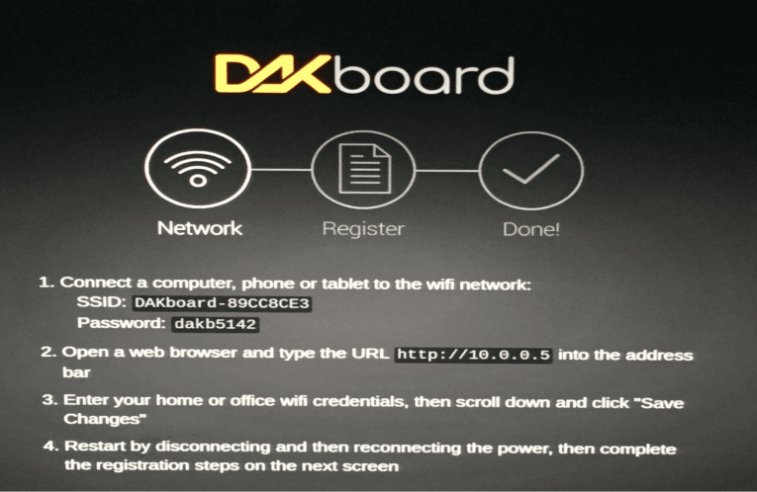
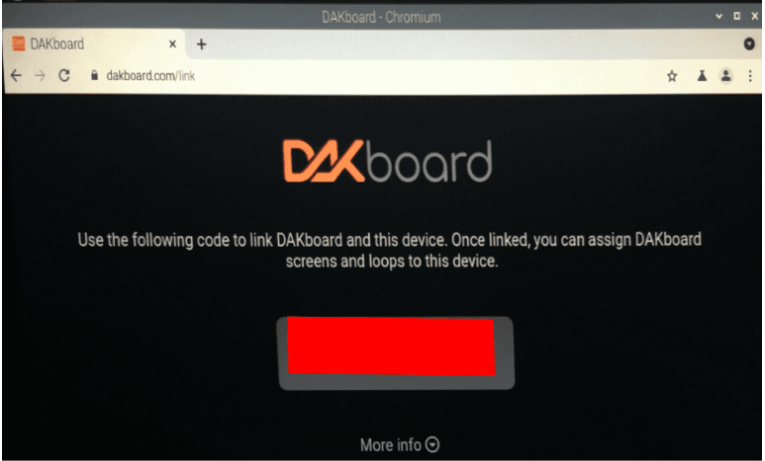
For instance, if we connect the computer, connect the WiFi by providing the “SSID” and “Password,” and then visit the supplied URL in the web browser, a screen with a “code” will be opened; after that, we must return to the Raspberry Pi browser and input the URL that was provided in Step 2 and then enter the code:
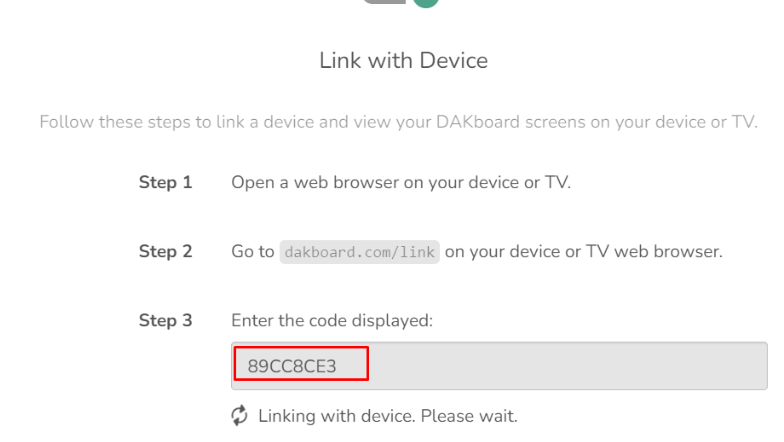
Enter the code that is shown below in order to connect the device to the computer:
The following is an example of the Dak board DIY webpage that was shown when the device was successfully connected:
Conclusion
The Dakboard operating system is equipped with a digital wall calendar that shows not only the time of day but also the date, the day of the week, the temperature, and the weather. In this post, we learned how to install the Dakboard on the Raspberry Pi and configure it so that we can use the Dakboard on the Raspberry Pi to display the digital calendar on whatever screen we want.